Setting up VSCode for REDCap External Modules
Original Author: Peter C, October 25, 2021
Install the VSCode Psalm Extension
This static code checker is used on all REDCap EM submissions, and it's a good one to have running in real time as we develop EM code. To install the Psalm VSCode extension, click on the Extensions icon (the blocks) and under "EXTENSIONS MARKETPLACE" search for "Psalm":
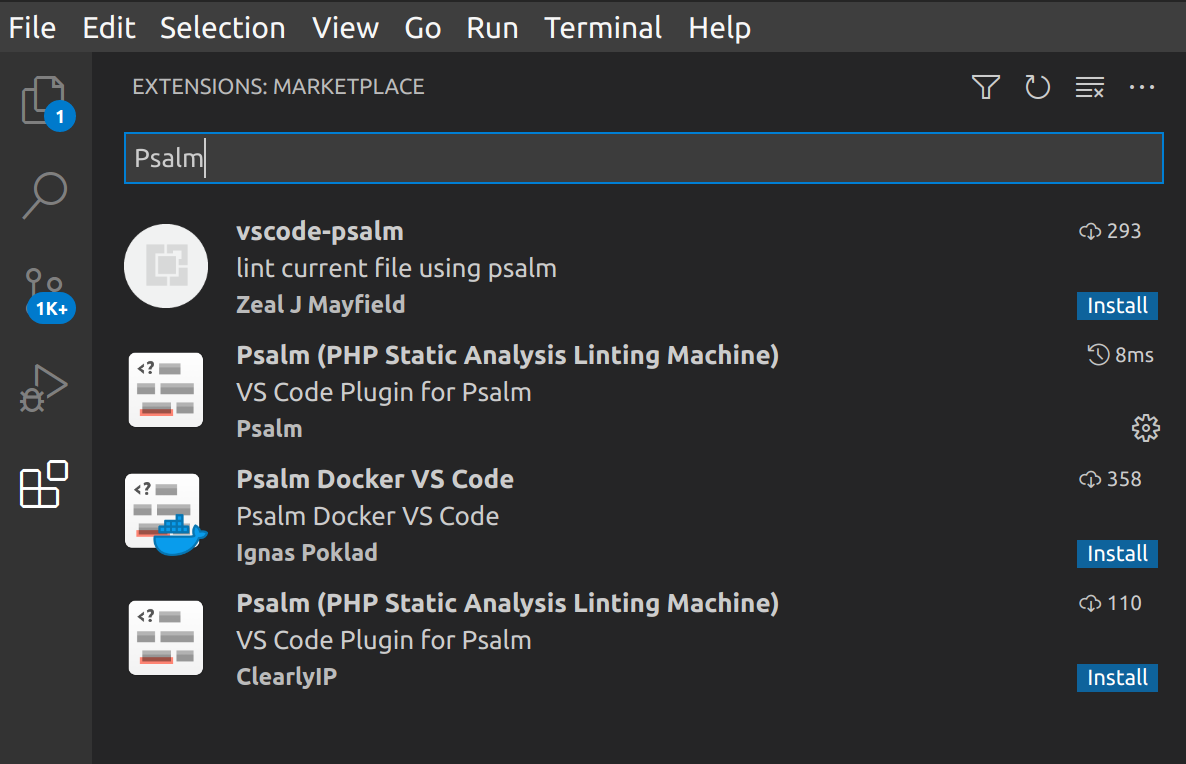
Install the second one on the list above, that is labeled "Psalm (PHP Statis Analysis Linting Machine)" and is attributed to "Psalm".
Reference: https://marketplace.visualstudio.com/items?itemName=getpsalm.psalm-vscode-plugin
Set Up the VSCode Project
The easiest way to initialize a VSCode project is to clone a GitHub repository. In this example, I establish a VSCode project for the "second language" EM.
First I created a folder in my home directory named vscodeProjects. This is to hold all VSCode projects.
Then I opened VSCode and clicked the "Source Control" icon to the left. I then clicked the blue “Clone Repository” button.
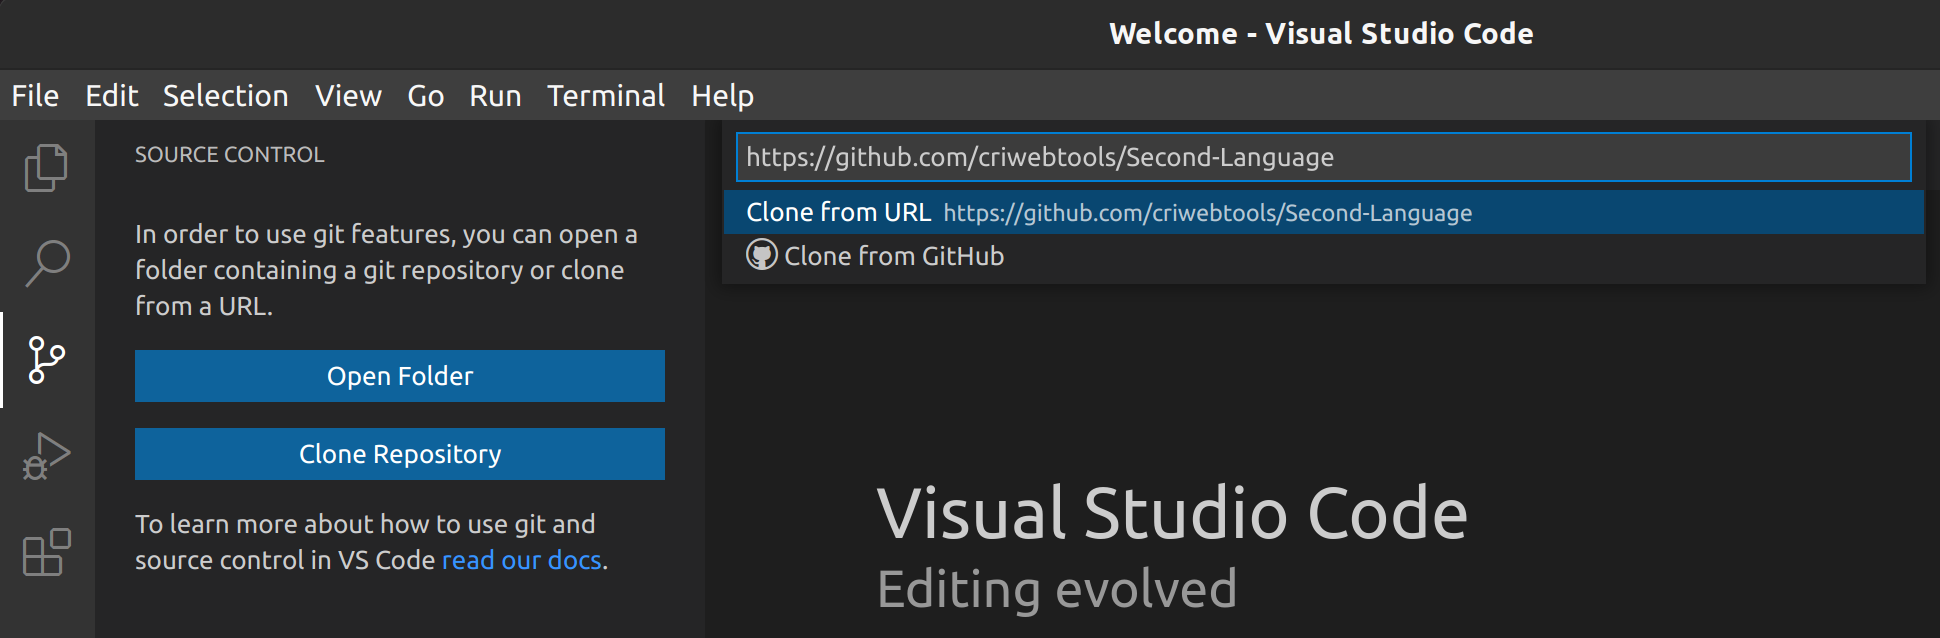
I pasted in the repo URL (https://github.com/criwebtools/Second-Language), then clicked "Clone from URL."
VSCode then prompted me for the location of the VSCode Repository (=Project). I navigated to the vscodeProjects folder.
caution
Do not create a subfolder for the project. VSCode will do that.
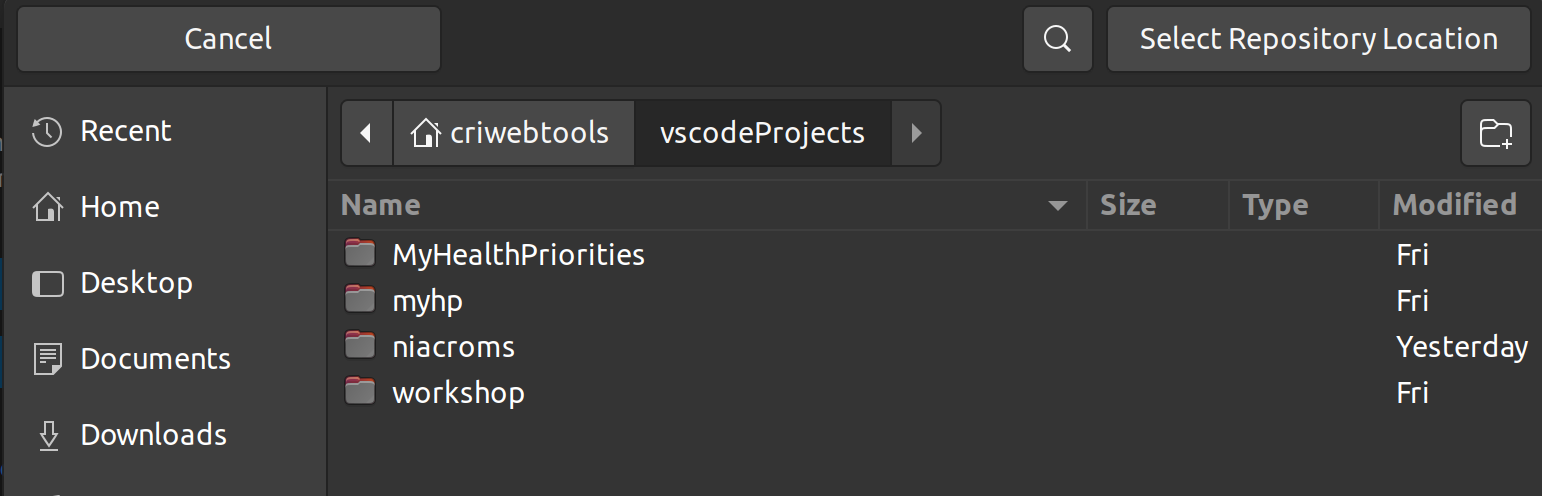
VSCode then created a folder within vscodeProjects named Second-Language, copied the files to it, and established the local Git repo.
Install Composer
If you haven't already, you must install Composer before you can install Psalm. This only needs to be done once. Follow the directions here:
At the end of your installation, you should be able to run Composer from anywhere, as the composer command.
Install Psalm for the VSCode Project
The VSCode Psalm extension doesn't actually install Psalm for your project. It merely enables support for Psalm, if it should so happen to be installed. Psalm needs to be installed in the VSCode project folder, using Composer.
Close VSCode if it is open.
Open Terminal and navigate to the project folder.
cd ~/vscodeProjects/niacroms
note
Here I am installing Psalm for a VSCode project named "niacroms." Of course your project location will be different.
Then run these two commands:
composer require –-dev vimeo/psalm
./vendor/bin/psalm --init
Reference: https://psalm.dev/docs/running_psalm/installation/
Edit the Psalm configuration file to include REDCap libraries
The Psalm installation and initiation steps will create a file in your project folder named psalm.xml. This file wants editing.
Edit psalm.xml
The initialization will have identified the files and folders within your project that need to be scanned. It will have also have set an error level. Both of these specifications should be edited.
The default errorLevel is set to 5, which pretty much requires a mass extinction to attract attention. I prefer 3 or even 2. Also we need to tell psalm where to look for REDCap class references. These can be either <file /> or <directory /> elements. I find that three REDCap folders seem to be sufficient for EMs:
• Classes
• Config
• ExternalModules/classes
Finally, it helps to specify the PHP version. A given EM might have a specific target PHP version, and we want to make sure that any code that is incompatible with the target version hasn’t crept in. For example, NIACROMS is targeted at PHP 7.4 whereas the older “Second Language” is targeted at PHP 7.2. Here is the modified psalm.xml for NIACROMS:
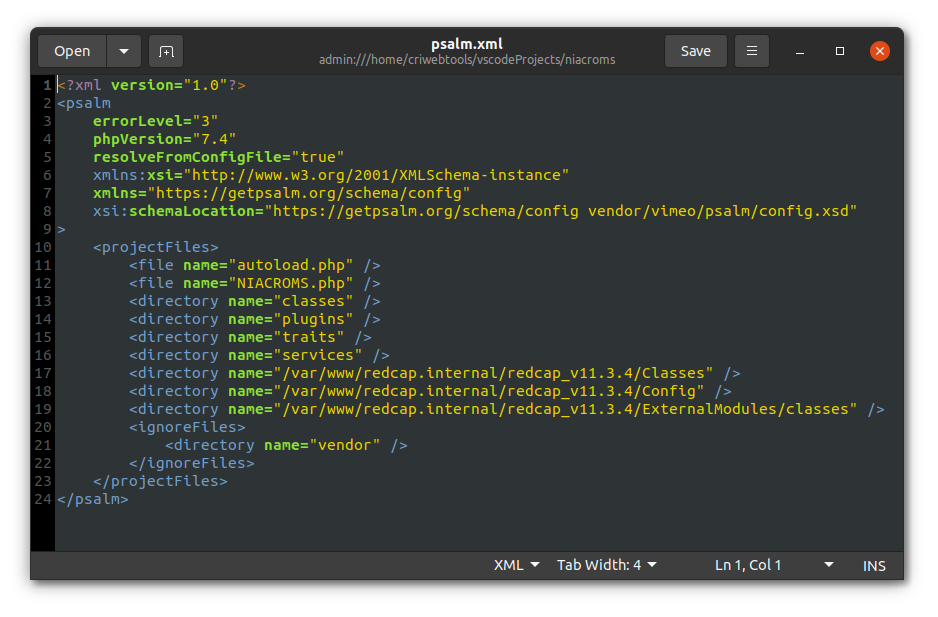
note
The varying use of "Classes" and "classes" is correct; there's some inconsistency in REDCap directory naming. Also pay attention to the REDCap directory names, since they will not match those on my workstation (mine are specific to REDCap v11.3.4).
Install and Configure Intelephense
Intelephense is a static code analyzer and “IntelliSense” server for PHP. It’s worth installing: 4.4 million downloads should tell you something. The PHP/JS/CSS IntelliSense features for code completion, refactoring and documentation are extremely useful. I’m not sure they are on the same level as PhpStorm, but close. Intelephense appears to do a better job at resolving external function references than Psalm.
Install Intelephense
You install Intelephense from the VSCode Marketplace, just as for Psalm. That is, you click on the Markeplace icon in the left panel, then search on “Intelephense.” Click on the Intelephense icon, and that’s pretty much it for installation.
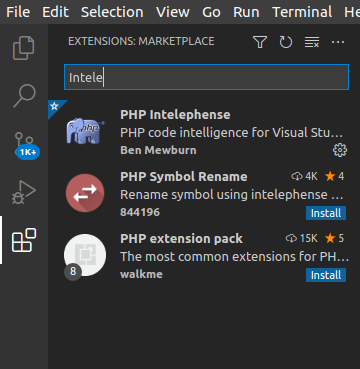
Reference: https://marketplace.visualstudio.com/items?itemName=bmewburn.vscode-intelephense-client
VSCode User and Workplace Extension Settings
Before getting to configuring settings, it’s worth going over how VSCode manages extension settings. VScode extension settings can be for a user (applies to all projects) or for a workplace (project). Both types of settings are stored in JSON files having identical structures. It’s good to know the locations of these files. I have found it easier to configure settings by editing these files rather than going through the VSCode UI. Being of only marginally sound mind, I find it easy to edit the wrong settings when using the UI.
The user JSCode settings file is:
~/.config/Code/User/settings.json
The workplace JSCode settings file is:
~/vscode-projects-folder/project-name/.vscode/settings.json
Since I store VSCode projects in ~/vscodeProjects, the location of the NIACROMS settings file is:
~/vscodeProjects/niacroms/.vscode/settings.json
Intelephense Settings: User
Here is what I have in my user settings file for intelephense:
"intelephense.environment.phpVersion": "",

"intelephense.environment.includePaths": [
   "/var/www/redcap.internal/redcap_v11.3.4/Classes",
   "/var/www/redcap.internal/redcap_v11.3.4/Config",
   "/var/www/redcap.internal/redcap_v11.3.4/ExternalModules/classes"
],

"intelephense.phpdoc.classTemplate": {
   "summary": "$1",
   "tags": [
      "class: ${SYMBOL_NAME}",
      "",
      "@package ${SYMBOL_NAMESPACE}",
      "@author Peter Charpentier, CRI Web Tools LLC"
   ]
},

"intelephense.phpdoc.functionTemplate":{
   "summary": "$1",
   "tags": [
      "",
      "function: ${SYMBOL_NAME}",
      "",
      "@param ${SYMBOL_TYPE} ${SYMBOL_NAME}",
      "",
      "@return ${SYMBOL_TYPE}",
      "@throws ${SYMBOL_TYPE}"
   ]
},
Leaving the intelephense.environment.phpVersion setting blank is – I believe – equivalent to selecting the CLI version installed on the workstation.
The intelephense.environment.includePaths setting is an array of directories that Intelephense should scan and index for resolving references. For me, these are the REDCap directories that I have so far identified as having classes and functions that might find their way into my code. These apply to all my EMs, but conceivably they could be different. The directory paths depend on the REDCap installation – yours will probably be different.
The intelephense.phpdoc.classTemplate and intelephense.phpdoc.functionTemplate settings are templates for PHPDoc blocks (you insert a PHPDoc block by typing /** just before a class/function and hitting Enter). The template format is extremely poorly documented; the above seems to work okay.
Intelephense Settings: Workspace/Project
The only project-specific setting I need is the target PHP version:
"intelephense.environment.phpVersion": "7.4"
Again, I created these settings by editing the User and Project settings files, basing them on the VSCode Marketplace Intelephense reference link above. You can also use the UI by clicking on the Intelephense Gear icon. Just be careful you know which settings you are working with.
Install and configure Deploy
Deploy is an extension for deploying files to staging and production servers. It works really well but you definitely need to edit its settings in the User and Project settings files.
You install Deploy from the VSCode Marketplace just as for Psalm and Intelephense, and then edit the Project/Workspace settings file to specify each deployment required for the project.
The Deploy settings are best shown by example: see the complete User settings example on the following page.
The Deploy object in settings.json specifies one deployment “package” for NIACROMS. The package specifications include a list of all files and directories that must be deployed, and a button to manually deploy the package. This button will be labeled DEPLOY.
The button is associated with 4 targets hosts, and these targets are described in the targets array.
Each object in the targets array specifies the type of connection (sftp), the host, the connection parameters, and the local directory for the deployment.
caution
Note that an External Module target directory is named according to the version, e.g., /var/www/html/redcap/modules/niacroms_v0.2.0, so care must be taken to update the Deploy section of settings.json whenever the EM version changes.
The Deploy settings will be manifest on the UI through the location of the DEPLOY button – really a link – on the bottom status bar.
![]()
After the DEPLOY button/link is clicked, the list of possible targets will be displayed in the upper command bar, thusly:
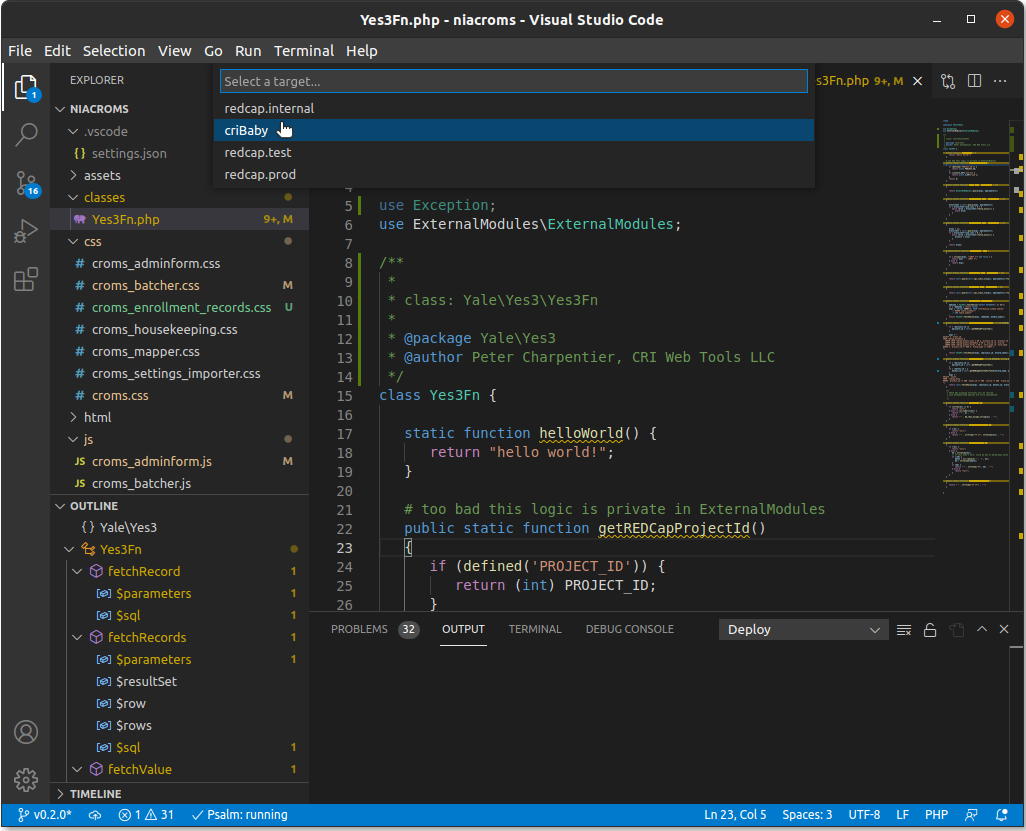
Once you have selected the deployment target, the files will be copied. If you did not specify a password for the selected target, you will be prompted for one in the same command box as the drop-down target menu.